When you hear the unmistakable sound of dripping water during a storm, panic can set in fast. You might not be able to get on the roof right away, especially if the weather is bad or it’s the middle of the night.
That’s when knowing how to fix a leaking roof from the inside becomes more than handy, it becomes necessary. It won’t be a permanent solution, but it will buy you the time you need to plan for a proper fix. Let’s walk through what you can do from the attic or ceiling side when a leak starts causing trouble.
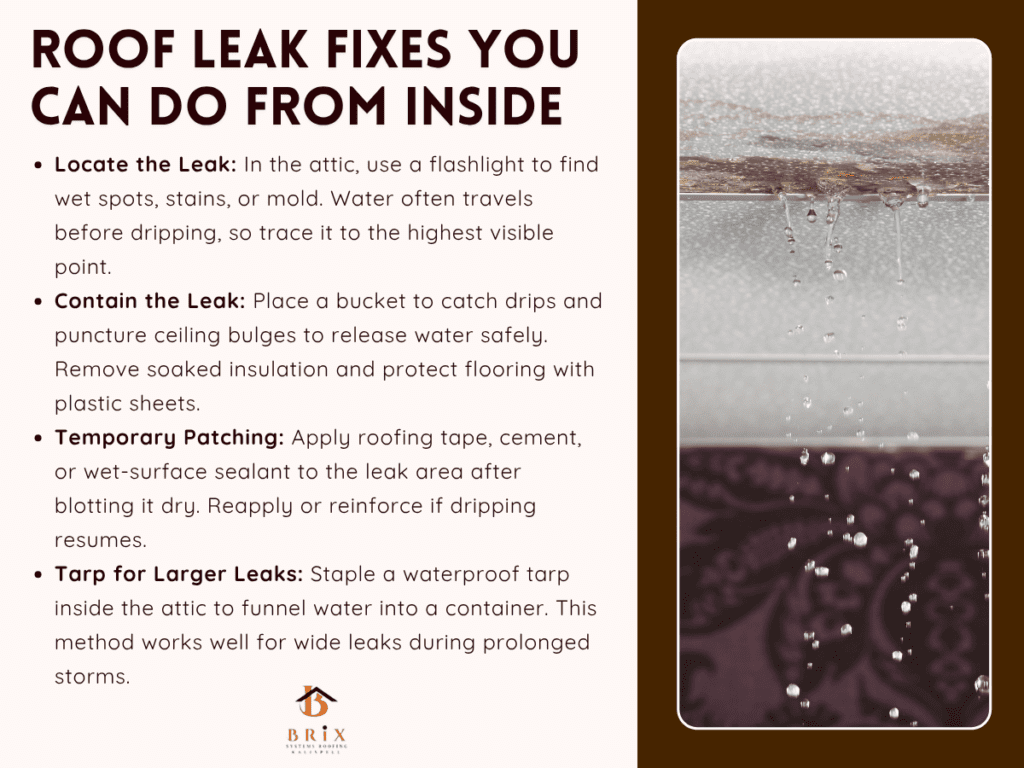
Locating a roof leak from inside can feel like solving a frustrating mystery. Water doesn’t always drip straight down from the source. It can travel along rafters, pipes, and insulation before it reveals itself in your living space.
The first step in fixing a roof leak from the inside is identifying exactly where the water is entering and tracing it back to its highest visible point. That means heading into your attic, turning off all the lights, and shining a flashlight across the roof underside. You’re looking for moisture, mold spots, stains, or darkened patches on wood. These signs help you figure out where the leak starts.
Sometimes, water seeps in slowly, making it harder to track in dry weather. If it’s actively raining, though, the source is usually more obvious. In homes without attic access, you may need to look for bulging spots on ceilings or fresh watermarks. That’s where water is pooling, and it usually leads back to the actual entry point above.
Another method is to use a friend and a garden hose. One person sprays water on the roof, one section at a time, while you observe from the attic. When drips begin inside, you’ve narrowed it down. Of course, this only works in safe weather. Never attempt this in a storm.
Once you’ve spotted where the leak is coming through, your next goal is to limit how much damage it causes. This is where containment and temporary patching come in.
Containment is critical to prevent water from soaking insulation, drywall, and flooring before you begin sealing anything. Start by placing a bucket or pan directly beneath the leak to catch drips. If water is splashing, line the bucket with a rag or towel to soften the impact.
Next, relieve any pressure from a bulging ceiling. If you notice paint bubbling or a heavy pocket forming, poke a small hole at the lowest point to let water drain in a controlled way. Otherwise, it could burst and dump gallons of water at once.
To reduce mold risk, remove any wet insulation around the leak. Fiberglass insulation loses effectiveness when soaked and becomes a breeding ground for mold. Wear gloves and a mask during this step. Place a plastic sheet or tarp under the area to keep further moisture away from household surfaces.
At this stage, you’re not yet repairing anything permanently. You’re managing the immediate situation while preparing for the next step: patching the leak from inside.
When the weather prevents outdoor roof work, you can temporarily patch the leak from the attic side. There are several materials that help in these scenarios, depending on what you have on hand.
A leak can be temporarily sealed from the inside using roofing tape, roofing cement, or a waterproof sealant designed for cold or damp conditions. Look for products that clearly say they work on wet surfaces or in cold temperatures. These are made specifically for emergency repairs.
Start by drying the leak area as best as possible. Use rags to blot excess water and a fan to encourage air circulation. A semi-dry surface allows better adhesion, even for wet-use sealants.
Once prepped, apply roofing tape or patching membrane directly over the leaking spot. Smooth it flat and press it firmly to ensure it bonds to the wood or underlayment. If you’re using roofing cement, use a putty knife to smear it thickly over the area, covering the leak and an inch or two around it. Some people also use spray foam for small cracks, though this isn’t ideal for larger holes or serious structural damage.
After patching, keep checking the area during the storm. Some materials only hold for a few hours or a couple of days. If the patch starts to drip again, reinforce it or add another layer.
In some cases, especially if the leak spans a wide area or runs along several rafters, the best method is to attach a tarp from the inside of the attic. You’ll need a large waterproof tarp, a staple gun, and boards to weigh down the edges.
Staple one end of the tarp as high as possible above the leak. Let it drape downward so water flows along it into a bucket or drain. Secure the bottom with boards or heavy objects. This creates a funnel that diverts water safely until a full repair is possible.
Tarps are best for short-term use, especially during multi-day storms. Never assume they will last more than a week without attention.
Fixing a roof leak from the inside can feel empowering, but it’s important to understand what this solution can and can’t do.
Interior roof repairs are temporary by nature and do not address the true cause of the leak, which always originates from outside the roof system. What you’re doing is creating a stopgap and a bandage until permanent exterior repairs can be made.
Most roofing systems include shingles, flashing, underlayment, and structural framing. When water finds its way in, it’s often due to a breach in that top protective layer. No matter how well you seal it from inside, rain and UV rays will keep eating away at the vulnerable spot unless it’s fixed from the top.
Some indoor patches may also trap moisture inside the roof system. If the water can’t evaporate, mold and rot may begin to develop in the decking or insulation layers. That’s why every temporary fix should be followed up with an exterior inspection as soon as weather permits.
Also, be cautious if multiple leaks are appearing at once or if your ceiling is sagging. This may signal structural concerns or long-standing water damage. In those cases, a professional roofer should be called promptly.
Once the rain passes and it’s safe to get on the roof, your next task is addressing the leak properly from the top side. Many homeowners attempt minor repairs themselves, but others hire licensed roofers for thorough inspections and warranties.
Any successful long-term repair begins with understanding what caused the leak and preventing it from happening again. If you patched it from the inside, don’t stop there. Use your inside discovery as a guide to locate the matching trouble spot outside.
You might find missing shingles, cracked flashing, ice damming along the edges, or damage from tree limbs. Each problem requires different treatment. Shingles can be replaced. Flashing might need resealing. For ice dam problems, improving attic ventilation and insulation helps prevent snowmelt from backing up under shingles.
Also, check your gutters. Overflowing or clogged gutters are a leading cause of roof leaks along the eaves. Water spills over and seeps under the first rows of shingles, especially in freezing weather.
If your roof is older than 20 years or shows signs of widespread wear, you may want to consider a full roof replacement instead of constant repairs. Many Americans plan roof replacements with tax returns or home equity funding, as it's one of the biggest but most value-adding home upgrades.
There’s a lot you can do to lower your risk of future leaks:
Creating a seasonal checklist helps. Every fall and spring, walk around your home, scan for missing shingles, and clear gutters. It doesn’t take long but saves you from unexpected ceiling stains later.
You don’t have to feel helpless when a roof leak starts in the middle of the night. Acting quickly from inside your home can reduce the mess, protect your property, and give you peace of mind until the storm clears. Knowing how to fix a leaking roof from the inside isn’t a permanent solution, but it’s often your best move at the moment.
From tracing the source to setting up tarps and sealing with roofing tape or cement, each step buys you time. Just remember that the job isn’t done until you’ve addressed the leak from the outside and made sure your roof is watertight again. Roofs are complex systems, and one small crack can lead to big issues if ignored.
So grab that flashlight, climb up into the attic, and take control. With the right tools and a plan, you can hold the line until professional repairs take over.